This documentation relates to last stable version of Cipango.
visit the last unstable documentation home.
Managing Cipango
JMX
Cipango JMX is based on Jetty JMX.
To start Cipango with JMX support, add the cipango-jmx.xml configuration file as follows:
java -jar start.jar --ini=start-cipango.ini --pre=etc/cipango-jmx.xml
SNMP
Compilation
By default, the SNMP is not compiled.
cd extra/snmp
mvn install
The SNMP module is using the SNMP4J library including the snm4j-agent-jmx which is distributed under the GPL license
Usage
To start cipango with SNMP support
java -jar start.jar etc/cipango-jmx.xml etc/cipango.xml etc/cipango-snmp.xml
MIB
Currently, there is no dedicated MIB defined for Cipango.
The SNMP agent publishes the standard MIB for the Java virtual machine (Java VM) instrumentation.
Currently, the following OIDs are exposed
OID |
name |
type |
description |
|---|---|---|---|
1.3.6.1.4.26588.1.10.1.0 |
messageReceived |
Counter32 |
Total number of message received (stats must be enabled) |
1.3.6.1.4.26588.1.10.2.0 |
messageSent |
Counter32 |
Total number of message sent(stats must be enabled) |
1.3.6.1.4.26588.1.10.3.0 |
sipVersion |
OctetString |
Cipango version |
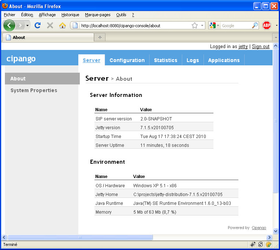
Web Console
The Cipango console is a Web application which allows to monitor Cipango.
The console can be used to display the following informations:
- System status
- SIP, HTTP, Diameter, SNMP configuration
- SIP and HTTP statistics
- SIP and HTTP message logs
- Servlets status and mappings
- System properties
It also allows to perform the following actions:
- Start and stop SIP Servlet applications
- Deploy new SIP Servlet applications
- Activate SIP, HTTP and diameter message logging.
Adding console support
To run cipango with console, start Cipango with:
java -Dcom.sun.management.jmxremote -jar start.jar --ini=start-cipango.ini --pre=etc/cipango-jmx.xml etc\cipango-callflow.xml
Using the console
The console is available at the fllowing URL: http://localhost:8080/cipango-console/
Replace localhost:8080 by the host and port set for HTTP configuration
Authentication
Authentication is enabled by default.
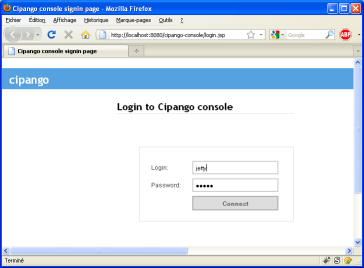
The default login is jetty with password jetty
Login and password could be changed by editing the file $jetty.home/etc/realm.properties like described in Jetty realms.